Back to TheWorxHub for Senior Living Main Menu
Work Order Settings
To access the Work Order settings in TheWorxHub:
- Click on the Settings tab, then select the Work Order tab.
Requestor Form Settings
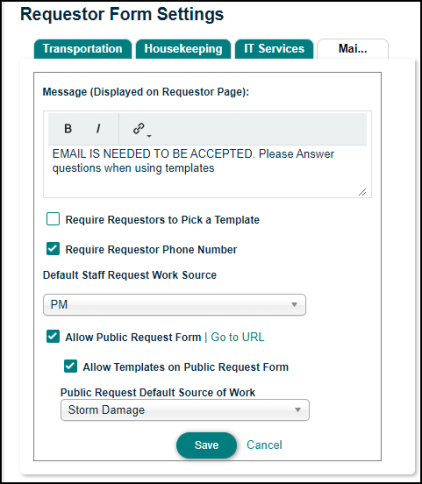
In this section, you can create customizable notes for your work order applications. This is useful when you need to announce important information to specific applications. You can also require Requestors to pick a template and provide their phone number. The Public Request Form can also be enabled and configured from this section.
- Select the application you are configuring.
- Enter the Message in the text box.
- Use the buttons on the text editor to make text bold (
 ), set it to italics (
 ), or create hyperlinks (
 ).
).
- Use the buttons on the text editor to make text bold (
- Check the box if you would like to Require Requestors to Pick a Template on work requests.
- Check the Require Requestor Phone Number box if you would like to require users to enter their phone number on work requests.
- Select a Default Staff Request Work Source if you would like all staff requests to use a certain source of work by default.
-
Check the box if you would like to Allow the Public Request Form. This will make the Public Request Form available from the login page.
- Check the box if you would like to Allow Templates on the Public Request Form.
- Select the Public Request Default Source of Work for this application from the drop down menu.
- Click Save to finalize the changes.
-
Once the Public Request Form has been enabled, click the Go to URL link if you would like to view the Public Request Form.
Work Order Form
You can easily customize the footer on your printed work order forms. This could be useful to display a monthly work safety tip, or to remind workers to note how much time they spent on the job.
- Select the department.
- Enter the Footer in the text box.
- Check the Require Labor Time box to make logging labor time on work orders mandatory for each person assigned before they can be completed. *Note: If you need to be able to complete work orders without labor time logged, the override permission Can Ignore Required Labor Time in the Users Settings under the Work Order permission category has already been turned on for the default TWH-owned Sysadmin and Managers roles. If other roles need this ability, a user with access to your User Settings can add this permission where needed.
- Click Save. The Footer will now appear on printed work order forms.
_372x214.jpg)
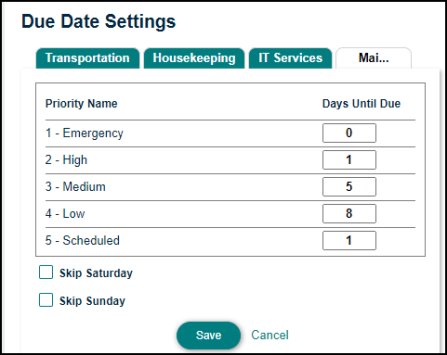
Due Date Settings
In this section, you can set the number of days allowed to complete the work order based on the work order's priority.
- Select the department.
- Enter the number of Days Until Due for each Priority.
- Check either the Skip Saturday or Skip Sunday boxes, if these days do not need to be counted in the number of days until due.
- Click Save.
Scheduled Work Order Settings
In this section, you can set the number of days allowed to complete scheduled work orders based on the time based recurrence of the work.
- Select the department.
- Enter the number of Days Until Due for each time based recurrence.
- Check either the Skip Saturday or Skip Sunday boxes, if these days do not need to be counted in the number of days until due.
- Check the Prevent completion of an asset based PM if there's an open corrective work order linked to that same asset option to prevent the completion of an asset-based scheduled work order if there is an open corrective work order tied to the same asset.
- Click Save.
Chargeback Rate Settings
These settings allow you set up chargeback rates for billing residents. For more information about setting up Chargeback Rates, see Billing Settings.
Resident Request Settings
- Select the department.
- Select the Default Requestor Work Source from the pick list. This will show as the Work Source when a request is entered by a requestor.
- Click Save.
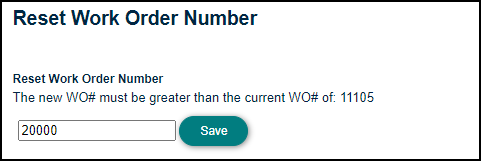
Reset Work Order Number
- If you need to reset the work order numbers, enter a number greater than the current WO# displayed on this page and click Save.
Budgets
This settings page allows you to define your fiscal start date, assign budget values, and set up default budgets.
Prior to adjusting Budget Settings, you must first define your Budget Codes. To do this, navigate to Pick List Settings, then select Budget/Account Code. Any Budget Codes added to the pick list will appear on the Budget Settings page.
- Click on the Budgets tab.
Define Your Fiscal Start Date
- Select the date that your fiscal year starts. This will be used to help calculate your year-to-date budgets.
- Click the Save Fiscal Year Start button. *Note: This only needs to be set one time, but can be edited later if necessary.

Assign Budget Values
- Select the Review Budget Year to set the values for that year's budgets.
- Enter the Budget $ for all applicable Budget Codes. *Note: The Budget Codes available here can be added and edited under Pick List Settings.
- Click Save to finalize the changes.
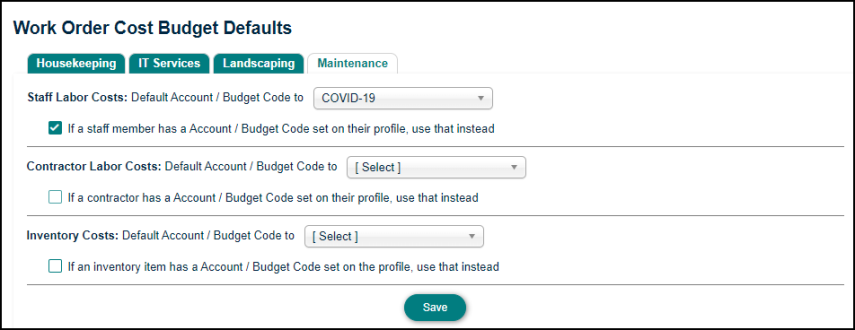
Work Order Cost Budget Defaults
- Select the department you are defining budget defaults for.
- Select the default budget code for the available transaction types.
- Check the box under the default budget code if a specific staff member, contractor, or inventory item's budget code should be used instead, when applicable.
- Click Save to finalize the changes.